In 7 steps to the perfect measurement result
How does LupoGait® work? In the following we show you step by step how to get an objective, reproducible measurement result.
If you were already mentally prepared to deal with a new, complicated system that may also require you to set up an additional practice room, you will be pleasantly surprised by LupoGait® and its simple, space-saving, and easy-to-maintain application.
With the help of the short instructions presented below, we will show you how to get perfect measurement results without the expense of extra storage space for a treadmill. Let us guide you easily through the 7 functional steps and demonstrate why LupoGait® is the movement diagnostic system that fits perfectly into your practice and everyday life.
Determine waistcoat sizes
The determination of the waistcoat size is based on the back length, weight, and body shape of the dog. In the process, a graphic measuring aid makes it easier for you to make the correct choice. The tight fit ensures the correct measurement and has the reassuring effect of a “thundershirt”. There are currently 11 sizes to choose from for dogs weighing from 1 to 55 kg.
Putting the system into operation
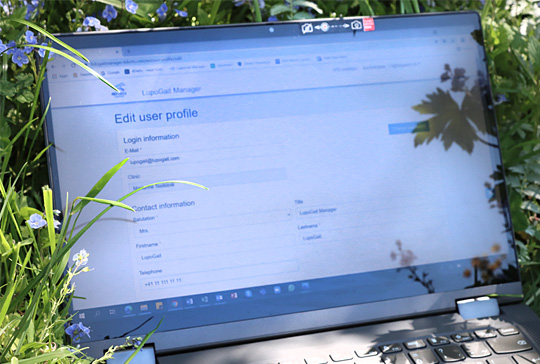
In the LupoGait®-Manager on your practice computer, the basic information of the dog (breed, age, sex, etc.) as well as the owner data are recorded. X-ray and other files can also be uploaded. This is only necessary for the first session and can be done before the visit.
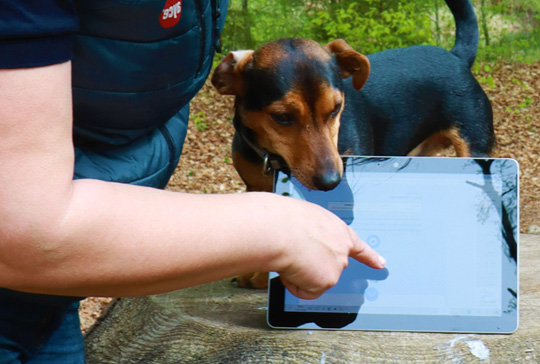
In the LupoGait®-app on the tablet provided, the dog patient recorded in the LupoGait® Manager is shown before each measurement and its data updated as required.
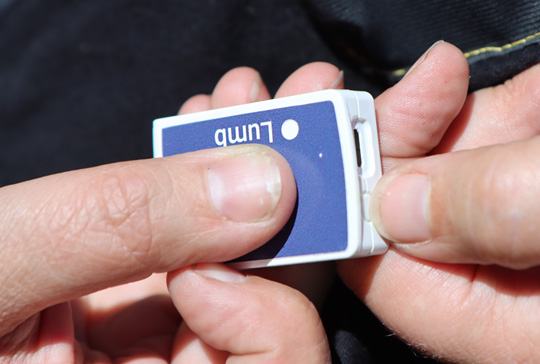
Activate and place sensors
Pressing the start button activates the sensor and it starts flashing. Movement maintains the activity of the sensor. In case of prolonged inactivity, it switches to a battery-saving sleep mode. When motion is detected again, the sensor resumes its activity and is ready to measure all over again.
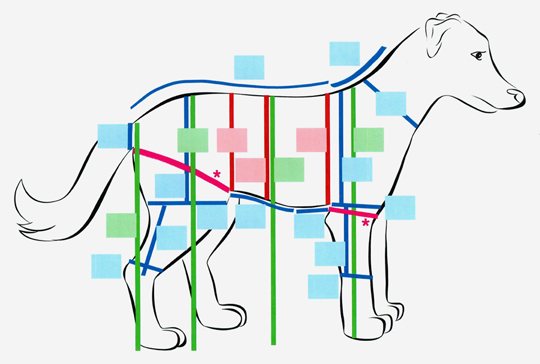
The sensors track the dog’s movement axes. For optimal measurement results, the sensors need close body contact, which is why they are strategically placed in small pockets on the inside of the waistcoat. The sensors can be charged while remaining in the waistcoat.
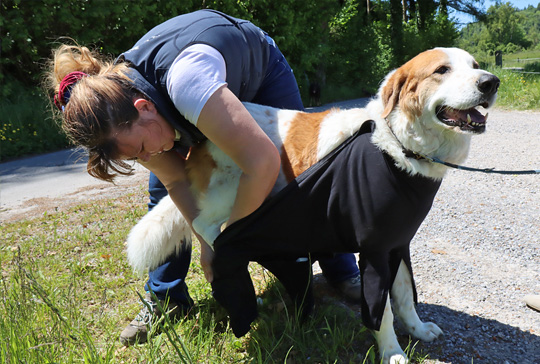
Putting on waistcoats
Enclose each front paw individually with your hand and pull it through the opening of the respective waistcoat leg. Pull the waistcoat up and secure it over the shoulders with the hook. Repeat this process with the hind paws. In the last step, close the zip at the back. Make sure the waistcoat fits snugly to provide security for anxious dogs.

Perform measurement
Once all sensors are active, select the desired patient on the tablet. Then go to the starting point of the 20-metre course and stand next to the dog before starting the countdown to the measurement. The handler tells the dog to remain still for 5 seconds before he/she leads the dog at a moderate pace to the end point of the track at the sound of the signal to start the measurement. You accompany both with the tablet in your hand. The dog must remain there for 5 seconds to complete the measurement. For this, no internet connection is necessary.
Retrieve measurement results
Back in the practice, or at a location that allows access to the internet, you can upload the data collected offline by the LupoGait® app in the LupoGait® Manager and retrieve 4 of the 21 parameters at a time, make them visible to yourself and others and send them as a PDF.
These options are not only a valuable way to discuss patient development with work colleagues or to include the collected data in referrals, but also make it easier and more efficient to show the health conditions and rehabilitation processes of the respective dogs when talking to dog owners.
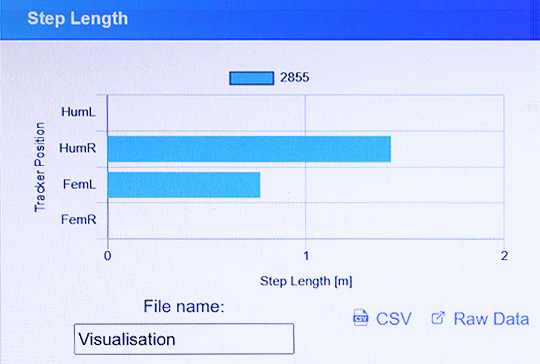
Interpretation of the measurement results
The measurements are presented in easy-to-read bar and curve diagrams. These provide information about, for example, the force distribution and symmetry of the different limbs, stance and swing phases, ROM, and other biodynamic parameters.
The diagrams help you to recognise where exactly there is a deviation from a healthy, physiological movement.
Especially for therapists working with manual techniques, this offers the possibility to visualise the therapy success in almost real time.
Changes in ROM, symmetry as well as thrust/carrying force and hyper-/hypometria can be easily identified.
This means that our LupoGait® movement diagnostic system is also a great help in monitoring motor-neurological patients (EMS, LMS, disc prolapse, etc.).